Sabtu, 02 Oktober 2010

CARA SETTING HOTSPOT DI MIKROTIK

Setting Billing Hotspot integrasi Router Mikrotik sangatlah mudah, setalah install mikrotik dengan benar, jalankan aplikasi “Winbox Loader” sehingga anda bisa mengkonfigurasi Mikrotik Router dari Desktop Windows secara mudah dan cepat tanpa harus menghafal command line Mikrotik. Setelah klik dua kali aplikasi Winbox maka akan muncul tampilan sebagai berikut :

winbox

Setelah itu klik tanda maka akan muncul MAC Address Mikrotik yang sedang aktif dalam hal ini klik dua kali Mac Address 00:0B:CD:64:D9:22 dan isikan user admin dan password secara default adalah kosong kemudian klik “Connect”

Login Winbox

IP ==> Address List
Klik tanda plus |+| kemudian pada “Address” kemudian isikan nomor IP yang diinginkan misal 192.168.1.110/24 (slash 24 artinya nanti secara otomatis akan mengisi Network dan Broadcast). Kemudian pada “Interface” pilih ether1 dimana ether1 yang akan terhubung dengan Modem/ISP.

IP Mikrotik

IP ==> Route List
Klik tanda plus |+| kemudian pada “Gateway” isikan IP Gateway anda, misal 192.168.1.1 Kemudian klik “OK”

Gateway Mikrotik

New Terminal
Maka akan muncul tampilan konsole sebagai berikut dan kemudian lakukan ping ke Gateway Internet anda, ketikkan ping 192.168.1.1 Jika berhasil maka akan tampilan seperti gambar di bawah ini dan itu artinya jaringan dari Mikrotik ke Gateway/Modem telah terhubung dengan normal.

Ping Gateway

Interface ==> Interface List
Ini adalah untuk melihat interface atau Ethernet card yang mana sedang aktif (konek ke jaringan) yaitu pada posisi “Tx” dan “Rx” maka akan muncul trafik xxx bps. Dalam hal ini adalah ether1 sedang terhubung dengan jaringan LAN

Interface Mikrotik

IP ==> DNS
Kemudian klik “Setting” pada “Primary DNS” isikan DNS1 misal 202.134.1.10 dan pada “Secondary DNS” isikan DNS2 misal 202.134.0.155 dan jika setelah klik “OK”

DNS Mikrotik

New Terminal
Lakukan testing ping keluar yaitu ke internet misal ke google.com dengan mengetikkan perintah ping google.com jika hasil seperti di bawah ini maka koneksi internet anda sudah konek.

Ping Internet

IP ==> Hotspot ==> Hotspot Setup
Pada “Hotspot Interface” pilih ether yang mana yang ingin di jadikan untuk hotspot, dalam hal ini adalah ether3 dan jika ada wireless antena anda pilih wireless. Kemudian klik “Next”

Setup Hotspot

Pada “Local Address of Network” adalah Gateway Hotspot anda, kemudian klik “Next”

Hotspot Gateway

Pada “Address Pool of Network” adalah Range IP DHCP yang nantinya di berikan ke user hotspot. Anda bisa tentukan berapa range IP inginkan dalam hal ini adalah dari 10.5.50.2 s/d 10.5.50.254 kemudian klik “Next”

DHCP Hotspot

Pada “Select Certificate” pilih “none” kemudian klik “Next”

SSL Hotspot

Pada “IP Address of SMTP Server” biarkan kosong kemudian klik “Next”

SMTP Mikrotik

Pada “DNS Servers” sudah terisi DNS anda dengan benar dan langsung aja klik “Next”

DNS Server

Pada “DNS Name” biarkan saja kosong kemudian klik “Next”

Hotspot Name

Kemudian langsung saja klik “Next”

Hotspot User

Setelah selesai maka akan muncul kotak dialog sebagai berikut kemudian klik “OK”

Mikrotik Hotspot Done

Kemudian lanjutkan dengan konfigurasi Hotspot Mikrotik agar terkoneksi dengan software Billing Hotspot sebaik berikut :

IP ==> Hotspot ==> Server Profiles ==> hsprof1 (klik 2x)
Dari tab “General” pindah ke tab “Login” kemudian hilangkan tanda centang (uncheck) pada “Cookies” kemudian klik “Apply”

Hotspot Authentication

Kemudian pindah ke tab “Radius” dan hilangkan tanda centang (uncheck) pada “Use RADIUS” kemudian klik “Apply” lalu klik “OK”

Hotspot Radius

Radius
Klik tanda plus |+| dan pada tab General beri tanda centang pada service hotspot kemudian pada “Address” isikan IP Address radius server Billing Hotspot (PC Linux) dan “Secret” isikan secret id misal 123457890 sesuai yang anda isikan di Linux, kemudian jika selesai klik “OK”

Radius Secret

Agar Halaman Login User Hotspot muncul halaman login Billing Hotspot seperti gambar di bawah ini

Login Page Billing Hotspot

IP ==> Hotspot ==> Walled Garden
Klik tanda plus |+| dan pada posisi “Action = allow” pilih “Dst. Address” isikan nomer IP server Billing Hotspot, misal 192.168.1.10 kemudian klik “OK”

Walled Garden
Jika selesai lakukan upload file ke dalam mikrotik yang udah di konfigurasi oleh Team software Billing Hotspot

Langkah selanjutnya agar Billing Hotspot terintegrasi dengan Router Mikrotik, anda harus login dulu ke Billing Hotspot Manager. Masukkan username, password dan Security Code dengan benar seperti berikut ini.

Login Manger Hotspot

Setelah berhasil masuk ke Billing Hotspot Manager, masuk Menu Preference ==> Setting Service ==> Pilih /var/www/html/config.client.php kemudian klik “Edit” dan jika selesai klik “Save”

$ipServer=”192.168.1.2”; ==> isikan nomor IP Server Billing Hotspot
$ipMikrotik=”192.168.1.10”; ==> isikan nomor IP Router Mikrotik
$userMikrotik=”admin”; ==> isikan nama user Router Mikrotik
$passMikrotik=”admin”; ==> isikan password Router Mikrotik

Config Billing Hotspot

Bila tidak bisa di simpan masuk ke Konsole sebagai root di Linux dan ketikkan perintah chmod 775 /var/www/html/config.client.php

Masuk Preference ==> Setting Service ==> Pilih /etc/raddb/clients.conf kemudian klik “Edit” tarik scroll ke baris paling bawah kemudian tambahkan empat baris perintah sebagai berikut dan jika selesai klik “Save”

client 192.168.1.2 ==> isikan dengan nomor IP Router Mikrotik
secret=123457890 ==> isikan secret sesuai di RADIUS Mikrotik
shortname=mikrotik ==> isikan dengan nama label ‘mikrotik’

Client Mikrotik

Masuk Preference ==> Setting Service ==> Pilih /etc/raddb/naslist kemudian klik “Edit”

Naslist Mikrotik

Bila tidak bisa di simpan masuk ke Konsole sebagai root di Linux dan ketikkan perintah chmod 775 /etc/raddb/naslist

Readmore »»

Jumat, 01 Oktober 2010

GAMBAR PEMAKAIAN HOTSPOT


Readmore »»

PENGERTIAN HOTSPOT

desainnya hotspotgambarnya hotspotpotonya hotspot

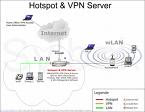
Hotspot adalah lokasi dimana user dapat mengakses melalui mobile computer (seperti laptop
atau PDA) tanpa mengguakan koneksi kabel dengan tujuan suatu jarigan seperti internet. Jaringan nirkabel menggunakan radio frekuensi untuk melakukan komunikasi antara perangkat komputer dengan akses point dimana pada dasarnya berupa penerima dua arah yang bekerja pada frekuensi 2.4 GHz (802.11b, 802.11g) dan 5.4 GHz (802.11a)

Pada umumnya peralatan wifi hotspot menggunakan standarisasi IEEE 802.11b atau IEEE 802.11g dengan menggunakan beberapa level keamanan seperti WEP dan/atau WPA. Perangkat laptop sudah banyak yang dilengkapi dengan adapter IEEE 802.11b atau IEEE 802.11g. Akan tetapi dapat juga digunakan peralatan wireless dalam bentuk PCMCIA atau USB.
Daerah hotspot di PENS saat ini adalah gedung D3, gedung D4 dan ruang manajemen PENS.
Readmore »»

Minggu, 26 September 2010

LOAD BALANCING MIKROTIK ROUTER OS


1. Memasukkan IP Address ke masing-masing interface.
# Ip address add address xxx.xxx.xxx.xxx/xx interface lan
# Ip address add address xxx.xxx.xxx.xxx/xx interface wan 0
# Ip address add address xxx.xxx.xxx.xxx/xx interface wan 1

2. Membuat address list pada address list agar setip client tershaping semua
# ip firewall address-list add list=Client address=ip-lan-local

3. Membuat Mangle pada firewall
# ip firewall mangle add
0 chain=prerouting in-interface=LAN connection-state=new nth=1,2,0 src-address-list=Client action=mark-connection new-connection-mark=odd passthrough=yes

1 chain=prerouting in-interface=LAN connection-mark=odd action=add-src-to-address-list address-list=odd address-list-timeout=1d

2 chain=prerouting in-interface=LAN connection-mark=odd src-address-list=Client action=mark-routing new-routing-mark=odd passthrough=no

3 chain=prerouting in-interface=LAN connection-state=new nth=1,2,1 src-address-list=Client action=mark-connection new-connection-mark=even passthrough=yes

4 chain=prerouting in-interface=LAN connection-mark=even action=add-src-to-address-list address-list=even address-list-timeout=1d

5 chain=prerouting in-interface=LAN connection-mark=even src-address-list=Client action=mark-routing new-routing-mark=even passthrough=no

4. Membuat NAT
# ip firewall nat add
0 chain=srcnat routing-mark=odd action=src-nat to-addresses=ip-publik1 to-ports=0-65535

1 chain=srcnat routing-mark=even action=src-nat to-addresses=ip-publik2 to-ports=0-65535

2 chain=srcnat action=masquerade

5. Membuat IP Route
# Ip route add gateway xxx.xxx.xxx.xxx routing-mark conn-satu
# Ip route add gateway xxx.xxx.xxx.xxx routing-mark conn-dua
# Ip route add gateway xxx.xxx.xxx.xxx

6. Memasukkan DNS
# ip dns set
primary-dns: 203.130.206.250
secondary-dns: 202.134.0.155
allow-remote-requests: yes
cache-size: 2048KiB
cache-max-ttl: 1w
cache-used: 660KiB Readmore »»

Jumat, 24 September 2010

cara setting load balance di mikrotik

Load-balancing & Fail-over di MikroTik

Kondisi : ISP dimana kita bekerja sebagai Administrator menggunakan lebih dari satu gateway untuk terhubung ke Internet. Semuanya harus dapat melayani layanan upstream & downstream. Karena akan beda kasusnya apabila salah satunya hanya dapat melayani downstream, contohnya jika menggunakan VSAT DVB One-way.
Untuk kasus ini dimisalkan ISP memiliki 2 jalur ke Internet. Satu menggunakan akses DSL (256 Kbps) dan lainnya menggunakan Wireless (512 Kbps). Dengan rasio pemakaian DSL:Wireless = 1:2 .

Yang akan dilakukan :

  1. Menggunakan semua jalur gateway yang tersedia dengan teknik load-balancing.
  2. Menjadikan salah satunya sebagai back-up dengan teknik fail-over.

OK, mari saja kita mulai eksperimennya :

  1. IP address untuk akses ke LAN :
    >
    /ip address add address=192.168.0.1/28 interface=LAN
    IP address untuk akses ke jalur DSL :
    >
    /ip address add address=10.32.57.253/29 interface=DSL
    IP address untuk akses ke jalur Wireless :
    >
    /ip address add address=10.9.8.2/29 interface=WIRELESS
    Tentukan gateway dengan rasionya masing-masing :
    >
    /ip route add gateway=10.32.57.254,10.9.8.1,10.9.8.1
  2. Pada kasus untuk teknik fail-over. Diasumsikan jalur utama melalui Wireless dengan jalur DSL sebagai back-up apabila jalur utama tidak dapat dilalui. Untuk mengecek apakah jalur utama dapat dilalui atau tidak, digunakan command ping.
    >
    /ip firewall mangle add chain=prerouting src-address=192.168.0.0/28 action=mark-routing new-routing-mark=SUBNET1-RM
    >
    /ip route add gateway=10.9.8.1 routing-mark=SUBNET1-RM check-gateway=ping
    >
    /ip route add gateway=10.32.57.254
  3. Good Luck!!

PCQ

Dengan menggunakan queue type pcq di Mikrotik, kita bisa membagi bandwidth yang ada secara merata untuk para pelahap-bandwidth™ saat jaringan pada posisi peak.

Contohnya, kita berlangganan 256 Kbps. Kalau ada yang sedang berinternet ria, maka beliau dapat semua itu jatah bandwidth. Tetapi begitu teman-temannya datang, katakanlah 9 orang lagi, maka masing-masingnya dapat sekitar 256/10 Kbps. Yah.. masih cukup layaklah untuk buka-buka situs non-porn atau sekedar cek e-mail & blog .

OK, langsung saja ke caranya :

  1. Asumsi : Network Address 192.168.169.0/28, interface yang mengarah ke pengguna diberi nama LAN, dan interface yang mengarah ke upstream provider diberi nama INTERNET;
  2. Ketikkan di console atau terminal :
    >
    /ip firewall mangle add chain=forward src-address=192.168.169.0/28 action=mark-connection new-connection-mark=NET1-CM
    >
    /ip firewall mangle add connection-mark=NET1-CM action=mark-packet new-packet-mark=NET1-PM chain=forward
    >
    /queue type add name=downsteam-pcq kind=pcq pcq-classifier=dst-address
    >
    /queue type add name=upstream-pcq kind=pcq pcq-classifier=src-address
    >
    /queue tree add parent=LAN queue=DOWNSTREAM packet-mark=NET1-PM
    >
    /queue tree add parent=INTERNET queue=UPSTREAM packet-mark=NET1-PM
  3. Good Luck!!

Memanipulasi ToS ICMP & DNS di MikroTik

Tujuan :

  • Memperkecil delay ping dari sisi klien ke arah Internet.
  • Mempercepat resolving hostname ke ip address.

Asumsi : Klien-klien berada pada subnet 10.10.10.0/28

  1. Memanipulasi Type of Service untuk ICMP Packet :
    >
    ip firewall mangle add chain=prerouting src-address=10.10.10.0/28 protocol=icmp action=mark-connection new-connection-mark=ICMP-CM passthrough=yes
    >
    ip firewall mangle add chain=prerouting connection-mark=ICMP-CM action=mark-packet new-packet-mark=ICMP-PM passthrough=yes
    >
    ip firewall mangle add chain=prerouting packet-mark=ICMP-PM action=change-tos new-tos=min-delay
  2. Memanipulasi Type of Service untuk DNS Resolving :
    >
    ip firewall mangle add chain=prerouting src-address=10.10.10.0/28 protocol=tcp dst-port=53 action=mark-connection new-connection-mark=DNS-CM passthrough=yes
    >
    ip firewall mangle add chain=prerouting src-address=10.10.10.0/28 protocol=udp dst-port=53 action=mark-connection new-connection-mark=DNS-CM passthrough=yes
    >
    ip firewall mangle add chain=prerouting connection-mark=DNS-CM action=mark-packet new-packet-mark=DNS-PM passthrough=yes
    >
    ip firewall mangle add chain=prerouting packet-mark=DNS-PM action=change-tos new-tos=min-delay
  3. Menambahkan Queue Type :
    >
    queue type add name=”PFIFO-64″ kind=pfifo pfifo-limit=64
  4. Mengalokasikan Bandwidth untuk ICMP Packet :
    >
    queue tree add name=ICMP parent=INTERNET packet-mark=ICMP-PM priority=1 limit-at=8000 max-limit=16000 queue=PFIFO-64
  5. Mengalokasikan Bandwidth untuk DNS Resolving :
    >
    queue tree add name=DNS parent=INTERNET packet-mark=DNS-PM priority=1 limit-at=8000 max-limit=16000 queue=PFIFO-64
Readmore »»

Senin, 23 November 2009

Instalasi DNS Server di Windows 2000 Server


Readmore »»

Instalasi DNS Server di Windows 2000 Server

How do I install and configure Windows 2000 DNS server?
by Daniel Petri - January 8, 2009
The Domain Name System (DNS) is the Active Directory locator in Windows 2000. Active Directory clients and client tools use DNS to locate domain controllers for administration and logon. You must have a DNS server installed and configured for Active Directory and the associated client software to function correctly. This article guides you through the required DNS configuration.
Install Microsoft DNS Server
Click Start, point to Settings, and then click Control Panel.
Double-click Add/Remove Programs.
Click Add and Remove Windows Components.
The Windows Components Wizard starts. Click Next.
Click Networking Services, and then click Details.
Click to select the Domain Name System (DNS) check box, and then click OK.
Click OK to start server Setup. The DNS server and tool files are copied to your computer.
Continue to the next step to configure the DNS server.
Configure the DNS Server Using DNS Manager
These steps guide you through configuring DNS by using the DNS Manager snap-in in Microsoft Management Console (MMC).
Click Start, point to Programs, point to Administrative Tools, and then click DNS Manager. You see two zones under your computer name: Forward Lookup Zone and Reverse Lookup Zone.
The DNS Server Configuration Wizard starts. Click Next.
If the Wizard does not auto-start, right-click your server name object in the DNS Manager console and choose Configure your Server.

Choose to add a forward lookup zone. Click Next. The new forward lookup zone must be a primary zone so that it can accept dynamic updates. Click Primary, and then click Next.

The zone name must be exactly the same as your Active Directory Domain name, or, if on a stand-alone or workgroup environment - the same as the suffix for all of the network computers that are to register with this DNS server. Type the name of the zone, and then click Next.

Accept the default name for the new zone file. Click Next.

Choose to add a reverse lookup zone now. Click Next.

Click Primary, and then click Next.
Type the name of the zone, and then click Next. The zone name should match the Network ID of your local subnet. For example, if your subnet range is from 192.168.0.1 to 192.168.0.254, type 192.168.0 in the name value.

Accept the default name for the new zone file. Click Next.

Click Finish to complete the Server Configuration Wizard.

//');
//]]>
document.write('');
createAndAttachAd("ns-84264785_1258966513", "http://ad.doubleclick.net/adj/ns.petri/archive;net=ns;u=ns-84264785_1258966513,11544023e988650,it_hardware_windowsservers,;;kw=;tile=2;ord1=652883;sz=300x250,336x280;contx=it_hardware_windowsservers;btg=;ord=4718277379482316?","300","250,336");
google_protectAndRun("render_ads.js::google_render_ad", google_handleError, google_render_ad);
After the Server Configuration Wizard is finished, DNS Manager starts. Proceed to the next step to enable dynamic update on the zone you just added.
Enable Dynamic Update on the Forward and Reverse Lookup Zones (Optional - Recommended)
In DNS Manager, expand the DNS Server object.
Expand the Forward Lookup Zones folder.
Right-click the zone you created, and then click Properties.
On the General tab, click to select the Allow Dynamic Update check box, and then click OK to accept the change.

Do the same for the Reverse Lookup Zone.

Enable DNS Forwarding for Internet connections
Click Start, point to Programs, point to Administrative Tools, and then click DNS to start the DNS Management Console.
Right click the DNS Server object for your server in the left pane of the console, and click Properties.

Click the Forwarders tab.
Check the Enable forwarders check-box.
In the IP address box enter the IP address of the DNS servers you want to forward queries to - typically the DNS server of your ISP. You can also move them up or down. The one that is highest in the list gets the first try, and if it does not respond within a given time limit - the query will be forwarded to the next server in the list.

Click OK. Readmore »»